
Before You Start
You will be well served to have on hand a pair of red/cyan (or red/blue) 3D glasses so that you can view the images in the Tutorial (check out the Tutorial header image) and so you can test your images when they are done. I have also found that it can be quite helpful to actually wear the glasses during various parts of the process.
(Throughout the tutorial, you may wish to watch for the “Please Put On Your 3D Glasses Now” notices! ;-))

But you don’t need to wear them right now.
Unlike traditional stereo photography which makes use a pair of slightly different originals to create the perception of depth in 3D, we will be developing a 3D anaglyph making use of a single source image. Before we delve into the process too deeply, first a little bit of foundational theory.
The Simple Explanation

Our perception of depth comes from the way our brain integrates two images from our two eyes — each eye seeing from a slightly different angle. We can simulate depth by providing each eye with it’s own discrete image — in this case, one red and one cyan. Without 3D anaglyph glasses we see both images (and so there is a “double image” effect — but with the use of such glasses, one image is filtered out with one lens, and the other image is filtered out by the other, so each eye gets its own discrete image. If the two images have been slightly adjusted in position (and this is emphasized if we do this differently for different layers) then we can be tricked into perceiving depth when the brain combines them. Click on the thumbnail to the right to enlarge the diagram.
Selecting An Image to Work With
Not all still images will be ideal for the creation of an anaglyph. The simplest image will have an object in the foreground and then a defined background behind. A more complex image may have a variety of foreground, mid ground, and background elements which can allow for a more interesting anaglyph.
Throughout this tutorial, we will understand the process through the exploration of the following original source images.
Sisyphus, by George Wither
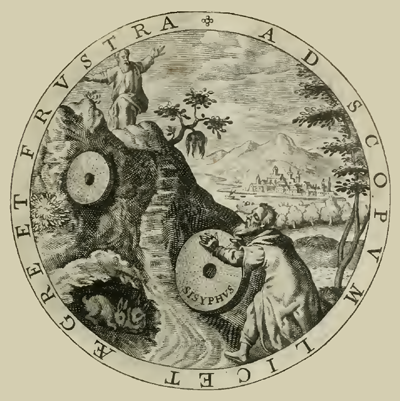
“Sisyphus, Illustration 11” from Emblemes: Illust. by Geo Wither (1635)
While originally drawn/engraved on a flat surface, this image has considerable perspective detail that provides visual cues as to depth — the foreground hill with Sisyphus, the trees (two depths of them — the large ones on the right and the smaller ones behind), the city and mountains in the background, and the distant sky. If we wish to isolate each of these elements, we can emphasize their relative positions along the z-axis (into and out of the image). As you can see, this image is an ideal candidate for turning into an anaglyph. (See the completed image)
John Gets His 3D Glasses On

“John Gets His 3D Glasses,” original image by @johnjohnston, via Twitter/TwitPic
As a photograph, John’s image provides a good capture of foreground and background elements. John’s hands and face are forward and will provide our front layers, and the seat, door and wall are clearly behind him and will provide our background layer. (See the completed image)
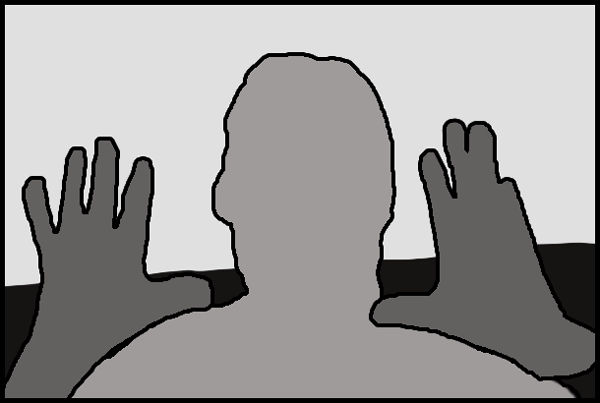
Foreground and Background Elements from “John Gets His 3D Glasses On.”
Your Image
If you start with a photo or image that allows you to perceive elements as belonging to either a foreground or background, then you have a candidate for an anaglyph.
If a focus element in your image is also centred in the foreground of your image then it is a candidate for emphasis. We will be emphasizing John’s hands (and his face, to a lesser degree) after we have isolated them.
Next: Part 2
Next: Part 2 – Separating the Foreground and the Background
Then: Part 3 – Colour Filtering (link to follow)
Then: Part 4 – Positioning the Layers to Simulate Depth (link to follow)
Then: Part 5 – Extending the Technique to make an Anaglyph-a-GIF (link to follow)


Recent Comments