My students and I undertook a little experiment today in response to the iPhone Photo Project topic of the day.
The #iPPP Day06 topic reads:
 #iPPPDay06 Experiment with the Tiny Planet Photos app. Try a variety of images and select your best Tiny Planet picture to post for today. Be patient, we’ll select a Tiny Tube picture for another day! Have fun!
As I was pondering what to shoot for the day, I though of those planet logos with figures standing on the circumference, holding hands. After a brief trip outside for a little walk and a few photographs, we returned to class to transform a linear image into a Tiny Planet image.
This is our result:
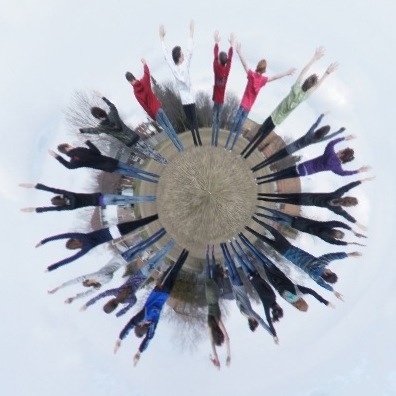
Our Own Classroom Planet by aforgrave, on Flickr
@hdurnin commented that she was planning the same idea as the cover for her grade 8 yearbook, which prompted a bit of reflection on my part into what I had learned from this morning’s experience. Here’s what I’m thinking, a few hours afterward:
Were I shooting this pic again (and I probably will!) I would consider the following:
- Be sure to photograph the students standing in a straight line (we did that, it’s important, providing a common horizon/planet surface for all the feet).
- If possible, have the students facing the camera, if privacy issues permit.
- Ideally, situate the students along the crest of a hill, so that their feet rest at/near the horizon. Note that in the above image, the feet extend “into” the planet. Also depending on what might or might not be behind them, try for either an unobstructed background, or a consistent one.
- Plan ahead so that all are wearing bright colours.
- Arrange in advance for a bright blue sky with fluffy white clouds, and green, green grass.
- Leave lots of room in your shot to allow you to crop either below (ground) or above (sky) and thus adjust the planet radius and the sky height. See the first Tiny Planet image below — a lot more sky makes for a much smaller planet! Cropping out some sky changed the proportions.
- Have more kids. This will decrease the kid size in relation to the planet circumference, allowing you to get something closer to the imagined image of planet with kids wringing it.
- IF possible (and it might be a big if, depending on the age of the students), have them hold hands, with their feet spaced a bit more apart. I’m thinking I’d be looking to create something like the UNICEF logo.
An alternative — this would be really cool, I’m sure I’ll try and do this — would be to ensure the subjects are standing on the horizon (hillside, photographer slightly below the crest of the hill, shooting up) and have them all jump, turning sideways, and tuck their feet — producing images arranged around the tiny planet — but kicked up and floating above the surface. That would make for a great pic!!
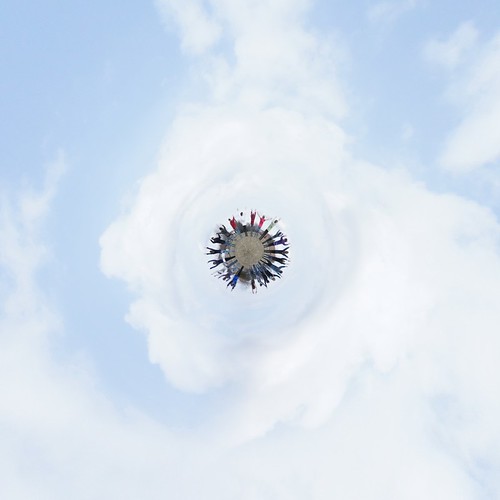
Our VERY Tiny Little Classroom Planet by aforgrave, on Flickr
Next time, I’ll also use a tripod and adjust the image for brightness/contrast. In today’s instance, speed/time was somewhat of the essence, and as a first pass at this project, we were very pleased. In hindsight, I think I also did a pinch-zoom and crop to produce the “final” image, which leaves it a bit blurry. Working towards a sharper and clearer image will be left for next time. But what fun!
If you do try something like this, please consider sharing it in a link in the comments below, including your relections so that we can all learn from this little challenge!
Check out all of the results from all the participating photographers by visiting the April 2011 iPhone Photo Project on Flickr.
Have fun!


Great advice. I hadn’t thought of having the kids wear bright colours, or post them on a hill, and I LOVE the alternative suggestion of jumping/tucking/turning. I can’t add more kids, but I can keep repeating until I get my sunny day.
So glad I joined this April flickr group.
I keep saying this, but thanks for all the advice – appreciative of all that I’ve learned. And it’s only day 6!
@hdurnin
Very cool! I couldn’t get any good pictures from the app today. They all kind of looked like a big swirl. Maybe I wasn’t doing it right. Will keep trying…..