There was a brief time when I switched hard drives (I’m thinking it was sometime during the late summer/early fall of 2012) when I poked around using GIMP to try to understand Animated GIFs because I didn’t have ready access to my Adobe Photoshop and there were some ds106 tutorials about GIFfing with GIMP. While I did make some limited progress with GIMP, I was still trying to understand the rudimentary aspects of making GIFs at the time, and so I didn’t have any good experience with which to extend my understanding of GIMP.
Fast forward a little bit, and I got my Photoshop installed, and I started poking around learning how to make GIFs using Photoshop, which is similar, but different. Getting my head wrapped around how Layers worked in conjunction with Frames in a Frame Animation within Photoshop took a while (and was the reason My New DS106 Shirt is Here GIF has languished — still) and really only came as I concurrently came to understand masking and reducing GIF file sizes. All told, it was quite a journey, characterized by progress, yes, but also reflecting many unfinished GIFs, and many, many pieces of GIFbits littering my hard drives.
And along the way — primarly resulting from GIFestivus2012 which started around December 1st and ran for over a month and a half — I developed a very bad case of GIF-Eye-tis. I still have it. It is a most beautiful affliction.
At any rate, I have much learning to document. Most of it is with Photoshop, but the concepts and techniques should be replicable with GIMP, and I am going to undertake to sort out some of them.
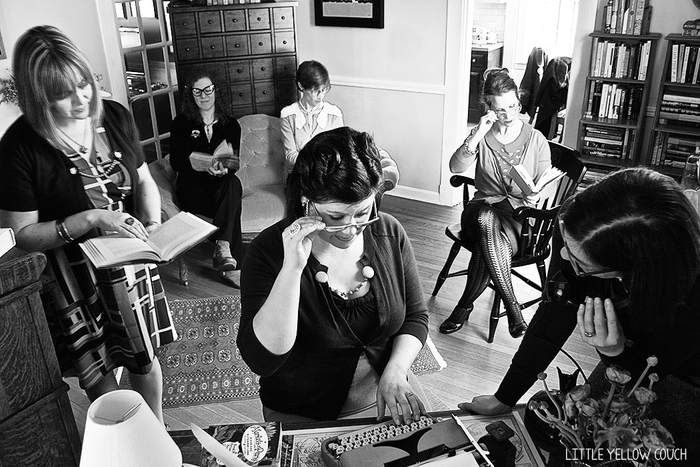
So, let’s say you have a series of images that animate nicely, like the ones that make up this GIF, “Red Alert,” from The Twilight Zone episode, Monsters Are Due on Maple Street.
“Red Alert” animated GIF, by aforgrave, from “Monsters are Due On Maple Street”
Viewed in GIMP, the GIF is composed of 8 layers with a canvas size of 600 pixels width and 448 pixels height (I’ve scaled the image shown above back by 50%, but the original dimensions are as given.)
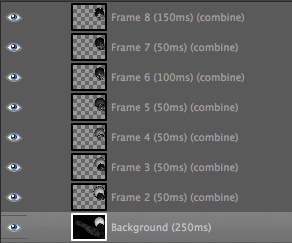
Fig 2: Red Alert GIF, 8 layers in GIMP
Perhaps you want to fit the GIF layers into — oh, I don’t know — a ds106zone Scene template card, which has a canvas size of 1128 pixels width and 752 pixels height. (Of course, the transparent window on the card is a bit smaller than that. but the point is we want to re-size ALL of the Red Alert GIF layers simultaneously and identically, so the animation remains.
Now, GIMP doesn’t appear to let you select more than one layer at a time (please correct me if I’m missing something). Changing them all, 0ne by one — and identically — is a labourious and involved process. I know, because I initially did that in Photoshop, and decided that there just had to be a better way. And as it would turn out, a similar solution exists for both Photoshop and GIMP.
The answer is collecting the layers into a Layer Group.
In GIMP, do the following:
- You need to use the Layers >> New Layer Group to create a group for your animation files.
- In the layers palette, drag the associated layers that animate together into the layer group you have created. They should appear within the Layer Group (it has a folder icon), displaying with an indent to show they are within the folder. Make sure you get them all in, and in their original order. I tried selecting multiple layers to move at once but had no luck with that, so it may not be possible. But get them all into the layer group folder.
- Once they are in the layer group folder. select that layer group within the layers palette so that you can change the group (and thus all the layers within it simultaneously)
- Now, use Tools >> Transform Tools >> Scale to bring up the resize handles on the group, as well as a Scale dialogue. Note that there is a link-unlink icon to the right of the dimensions in the Scale dialogue. If you have it set to link, then the scaling will maintain the aspect ratio which will keep your image looking proportionate.
- Once you have the group scaled appropriately, press the return key to apply the transformation.
Note that you can apply other transformations to all of the layers in a group — rotate, flip, etc. The key is to group all of the layers within a layer group and then apply the transformation.


This is really helpful, thanks! I did it and it worked like a charm. But then I ran into another issue. After scaling the layers in the new layer group I created, I needed to move them together as a group because they still didn’t fit quite well within the template frame I was using (yep, a ds106zone trading card). But I found I couldn’t use the move tool to move the layer group as a whole (I made sure I had the layer group selected, and not one of the individual layers). After a bit of searching on the web, I found the option for “linking” or “chaining” layers together (see, e.g., this: http://graphicssoft.about.com/od/gimptutorials/a/link-layers.htm). When I linked all the layers within the group together, I was able to move them all as one. I don’t know why that doesn’t work in the layer group. Or maybe I was doing something incorrectly.
I also found that the gif wouldn’t animate with the layers in the group, so I had to take them back out of the group again after scaling them. But that’s not a big deal–easy to do, just a little tedious!
And just for fun, I just tried to scale the layers together just by using the linking option noted above without a layer group. Nope; doesn’t work. Or again, didn’t work for me, though perhaps I wasn’t doing it correctly. I guess to scale together you need a layer group, but to move together you need to link the layers. So to do both you need to first create a layer group, then link the layers within it. At least, that’s what I had to do!
Rather a pain, but hey…what do you want for a free and open source program?
You can move the layers together as a group if you open up the “move” tool options and instead of using the default “Pick a layer or guide”, tick the option titled “Move the active layer”. Then if you have the layer group selected, it will move all of them simultaneously.