I was flipping through the DS106 The Daily Create twitter stream this afternoon and I came across a post by Mariana where she had tried out a GIF making app — ImgPlay. Her assessment was that the app created a rather large GIF (too large for Tumblr — been there!) and with some undesirable movement (I gather the original came from a hand-held video?), and so she went into Photoshop to get a better result.
I’m including Mariana’s three images here so that you can see her progression:
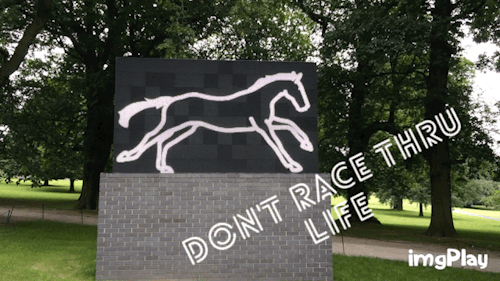
GIF #1 – file size, 1.5 MB, direct from ImgPlay
You can see the original movement inherent in the hand-held video. Note we get full colour, and smooth movement. The file size, however, is 1.5 MB. That’s big for a GIF.

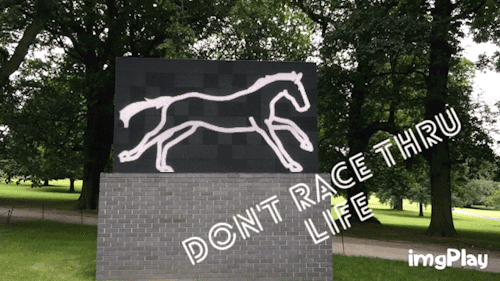
GIF #2 – File Size 382 kb
Mariana’s second GIF retains the unwanted jerking of the original, but a small colour palette results in a smaller file size.

GIF #3, 230 KB
Mariana’s third GIF is even smaller, but there’s a trade off in speed of the horse’s gait and the number of colours.
How Can We Make a GIF Smaller, but Retain Colours and Frames? Use a Mask!
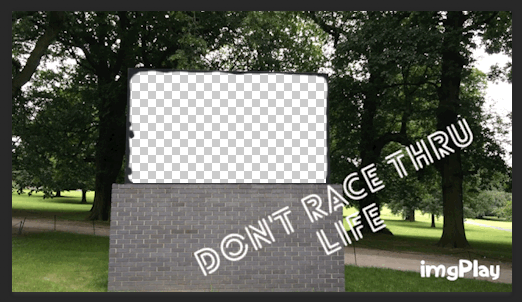
Below is a new GIF, re-made from the original, and retains the full colour and smooth movement of the horse. However, through the use of a mask, the image now loses the the jerky frame-to-frame movement of the surrounding trees, and the file size is considerably smaller at 305 KB — essentially 1/5 the file size of the original.
GIF #1 redone, with mask in Photoshop, at 256 colours, 305 KB
The secret is in the use of a mask to cut down on the number of pixels that change from frame to frame within the GIF. The fewer pixels that change, the smaller the final size of the GIF.
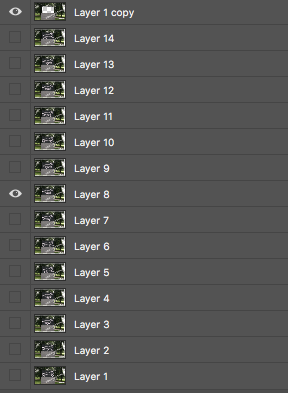
Although there are different ways to create a mask, the simplest conceptually may come from taking one frame of your GIF, cutting a hole wherever the image needs to change, and then placing that frame at the top of the stack of layers, making sure that it is visible for all frames of the GIF. Here’s the mask that I used for the re-do:
Screen capture of the mask used as the top layer for all frames
Getting a grasp of the dance between layers and frames in Photoshop when GIFfing is something that took a bit of trial and error to get straight in my head, back in the day. Early efforts using GIMP did not help, as everything needed to be a different frame when making a GIF in GIMP — you wound up merging lots and lots of bits to make the different frames, whereas Photoshop simply lets you turn layers on and off on a frame-by-frame basis, allowing you to keep the primary pieces and keeping everything much simpler.
At any rate, making 4/5th of the image static from frame-to-frame drops the file size considerably. A really great benefit is that you can include more frames (keeping movement smoother) AND maintain colour fidelity much more easily, both resulting in a better looking GIF.
I’ve downloaded ImgPlay to my iPhone and will be experimenting with it. Steadying your phone (a tripod or a wall helps, when they are available) if you know you want a stop-motion or GIF is always important — but you aren’t always thinking ahead when you take a video.
GIFfing while on the go is fun — and taking time with Photoshop is not always desirable. Having said that, if you have a bit of time, and want a really superior GIF, you probably can’t beat Photoshop.
Here is the Photoshop file if you want to take a look inside.


Recent Comments