
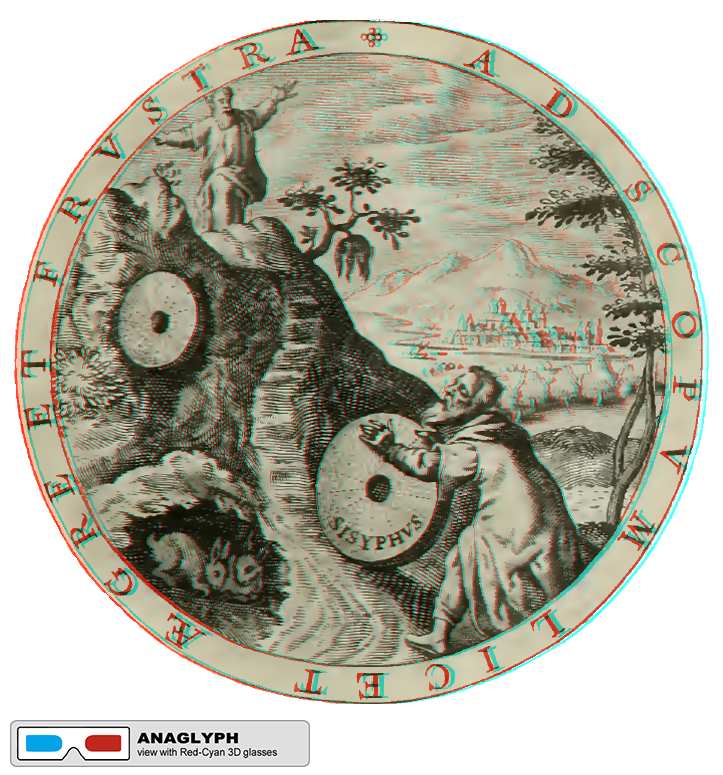
“Sisyphus Anaglyph” by @aforgrave, based on illustration 11, Emblemes, Illust. by Geo. Wither (1635)
Sisyphus pushed the stone up the hill — and George Wither captured it in his 11th Embleme in 1635.
After last week’s introduction of #GIFfight! entries based on Emblemes, Illustrated by Geo. Wither (published 1635), I’ve enjoyed not only the opportunity of creating animated GIFs from his art, but also some nice learning from the challenge of creating 3D anaglyph GIFs as well.
The image above represents my second attempt at a 3D red/cyan anaglyph, and I will say that the process went considerably faster the second time than the first. I started developing this anaglyph with the intention of wrapping a complete Anaglyph Tutorial around it, but I have this afternoon encountered and anaglyphed another image that will also be used to describe part of the process. Follow the links below (as they are developed) to each part of the process.
An Outline of the Process
Note that I have used Photoshop, and so you may have to alter the technical steps somewhat if you are using another image editing program. However, the four steps listed below will be consistent regardless of what you use. Greater details, should you require them, will be linked to each of the following.
1. Work with an image that has clearly defined background and foreground elements.
2. Separate the foreground element from the background into separate layers.
3. Make two copies of each layer, and filter one for red and one for cyan.
4. Adjust the x-positions (left or right) of the red and cyan layers to effect a perceived change in their z-position (into or out of the screen)
The Tutorial
Part 1: Selecting the Image
Part 2: Separating Foreground and Background
Part 3: Colour Filtering (link to follow)
Part 4: Positioning Layers to Simulate Depth (link to follow)
Part 5: Extending the Technique to make an Anaglyph-a-GIF (link to follow)
As previously indicated, there are two new assignments in the DS106 Assignment Bank that you may wish to explore:
I’m looking forward to seeing what you come up with!


Recent Comments